Running your game server
In this section, you will learn how to run your first game server.
Understanding Hosting Models
Before proceeding, consider reviewing the hosting models guide to understand the difference between Vessels (long-running servers) and Armadas (session-based servers), and choose the right approach for your needs.
Prerequisites
In order to follow this guide, make sure you have the following:
- User credentials to access your GameFabric UI and environment of choice
- A container image that has been pushed to a branch in the registry
- Basic understanding of Agones SDK integration for proper game server lifecycle
Log into the GameFabric UI before proceeding.
Create configuration files (optional)
If your game server requires configuration files, you should add those before creating your first game server.
Visit the "Config Files" section in the navigation bar on the left of the interface, and click the "Add File" button.
You may give a name and description to the file, as you did with branches. Then, simply write the contents of your file, press "Next", verify that the configuration file is correct, and click "Create ConfigFile".
Create a Vessel
Visit the Formations section of the UI, and click on the blue "Add" button, on the top right of the interface.
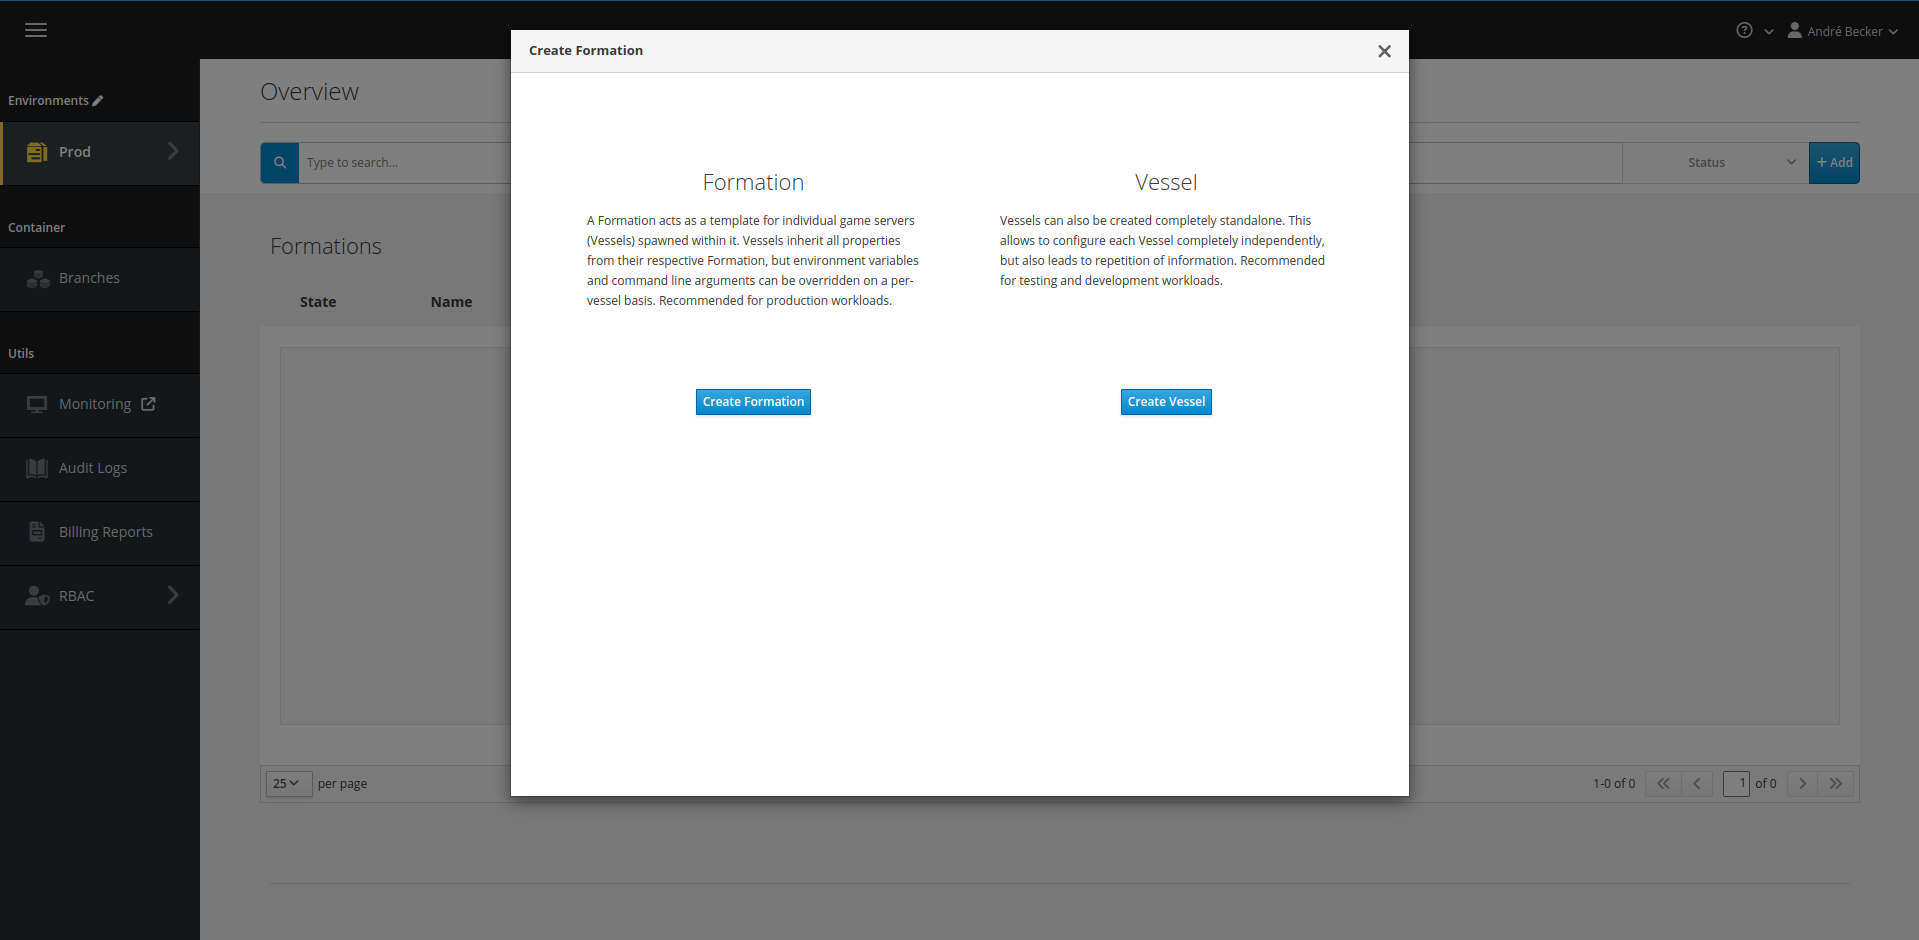
Kind
You are now given the choice between creating a Formation and an individual Vessel. Pick "Vessel".
Vessels allow you to spin up individual game servers and to define a unique configuration for each of them, which is ideal for a first integration. Later, you will use concepts like Formations, Armadas and ArmadaSets to efficiently manage large numbers of game servers at once.
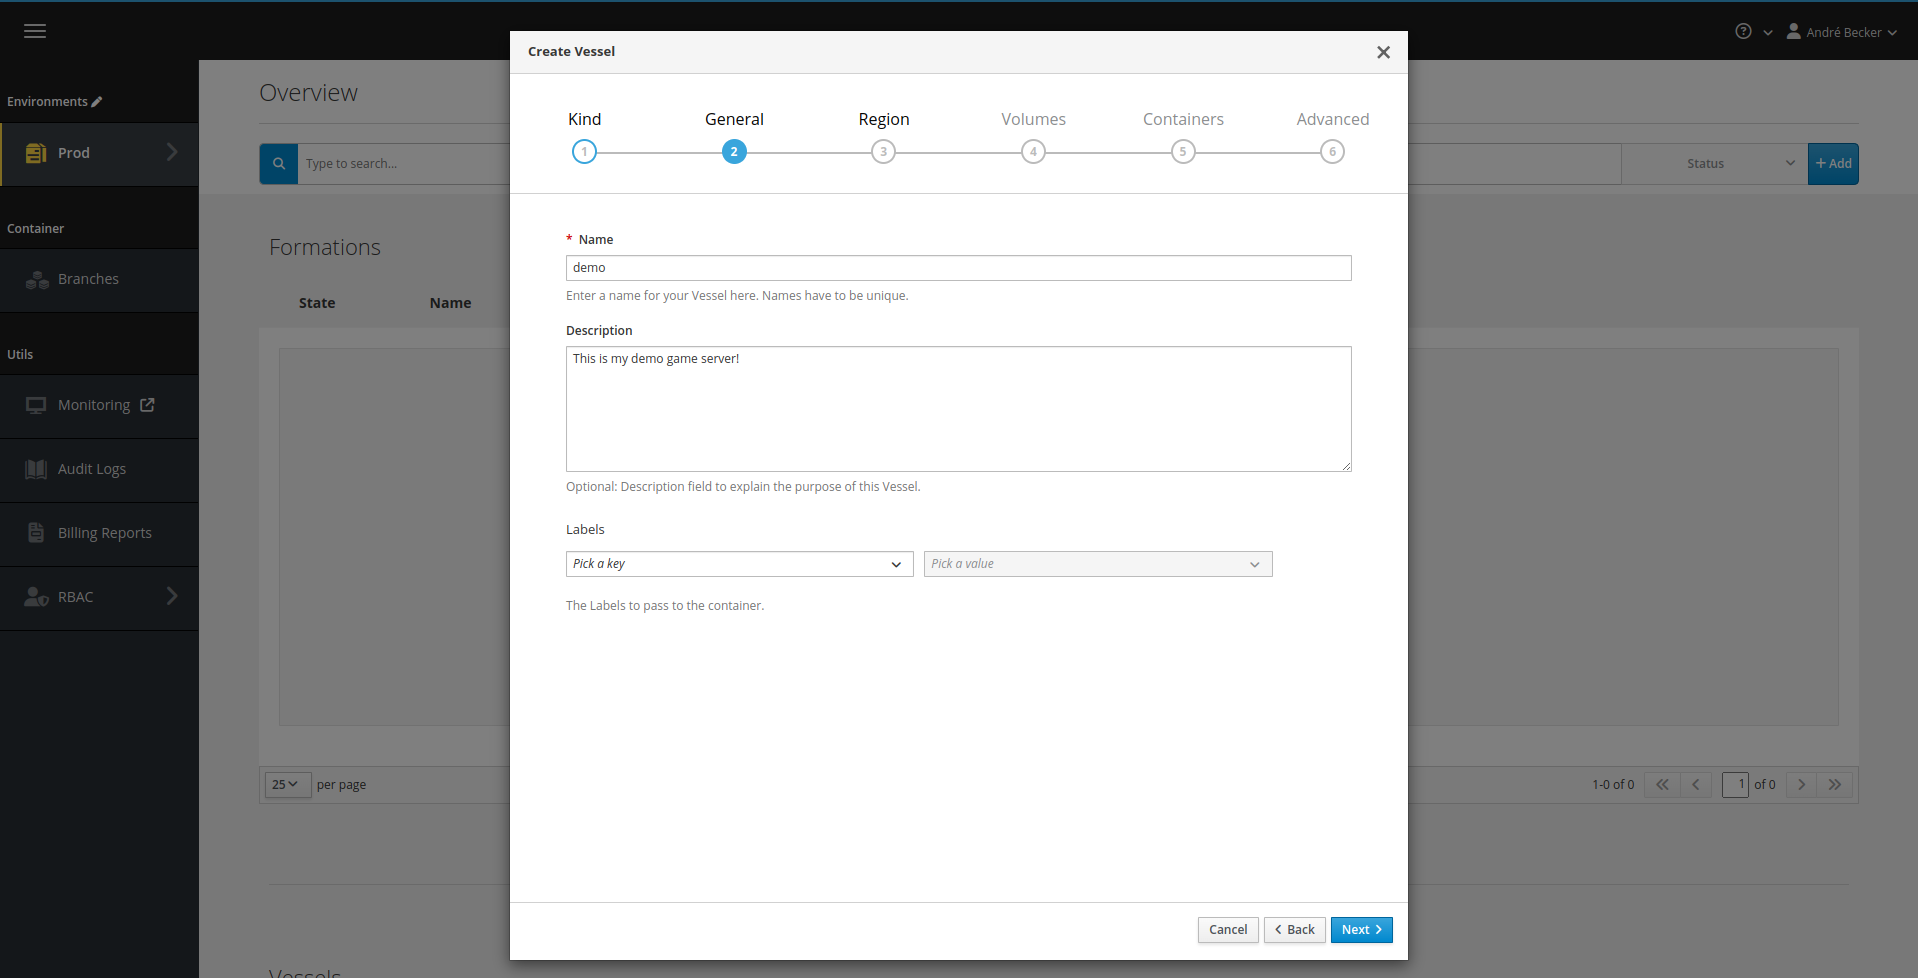
General
In this step, specify a unique name for your Vessel. You can also assign a description as a reminder what this Vessel is used for.
Region
Select the Region that this Vessel should run in. Please note that you do not need to specify the type of capacity within the Region (i.e. Bare Metal vs. Cloud). This scheduling decision is performed automatically and adjusts dynamically when capacity changes.
Region Immutability
The Region of a Vessel is immutable, which means that if you want to change the Region, you need to create a new Vessel and delete the old one. This is because the Region is a fundamental part of the Vessel's identity and configuration.
Instead, the Vessel can be cloned, which creates a new Vessel with the same configuration as the original one, but with a different name and Region. This allows you to easily create multiple similar Vessels in different Regions without having to manually configure each one from scratch.
Volumes
Volumes are an advanced mechanism to share data between multiple containers within the same pod. Skip it for now.
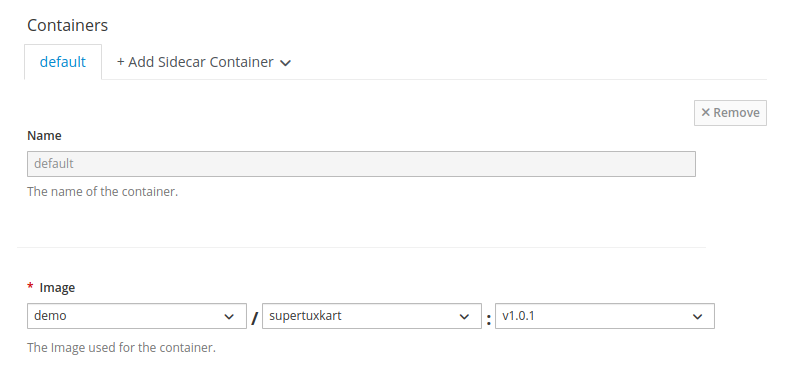
Containers
The Containers section contains the majority of your game server configuration.
Image
The first thing to do is select the image you previously pushed to your branch. This makes the game server container use that image.
WARNING
If you select autoUpdate, pushing a new version of your game server image immediately triggers an automatic rollout. This can be very convenient for development purposes, as it avoids you having to edit the Vessel whenever you push a new version.
Environment variables
Environment variables are a convenient way of exposing configuration options to the game server without defining a full configuration file. You can define them as static key/value pairs, or, by selecting the "Pod Field" type, expose metadata about the deployed game server, such as the name of the region the game server is deployed to or the version of the image in use.
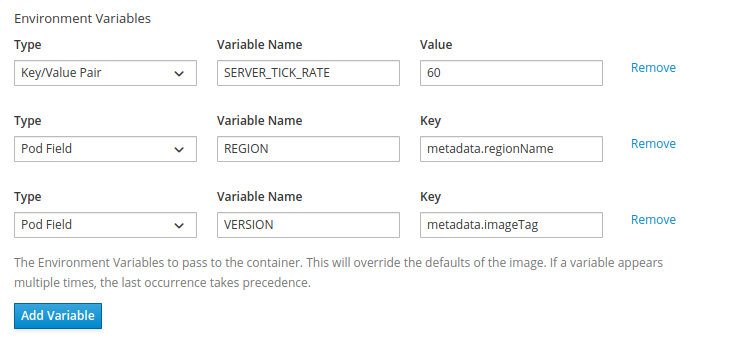
Supported pod fields are:
| Pod field | Description | Resolved by |
|---|---|---|
metadata.name | Name of the game server, usually referring to the unique pod name. | Kubernetes |
metadata.labels['<KEY>'] | Accessor to the game server labels. | Kubernetes |
metadata.armadaName | Name of the associated Armada. | GameFabric (Armada only) |
metadata.vesselName | Name of the associated Vessel. | GameFabric (Formation only) |
metadata.regionName | Name of the region. | GameFabric (any) |
metadata.regionTypeName | Name of the region type. | GameFabric (any) |
metadata.regionTypePriority | Priority of the region type. | GameFabric (any) |
metadata.siteName | Name of the site. | GameFabric (any) |
metadata.imageBranch | Name of the image branch of the used game server image. | GameFabric (any) |
metadata.imageName | Name of the used game server image. | GameFabric (any) |
metadata.imageTag | Tag name of the used game server image. | GameFabric (any) |
For more information, see the full list of supported Kubernetes fields.
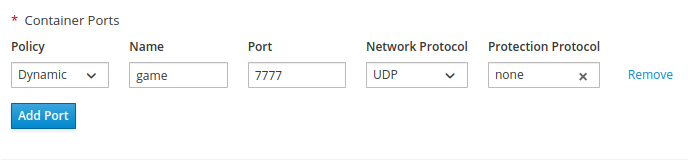
Ports
Ports determine how your game server can be reached from the outside world. Game servers live behind Network Address Translation (NAT), that means the public IP and ports differ from the IP and ports that the game server binds to locally.
There are two types of ports you can configure:
- Dynamic is the preferred default. The game server locally binds to a predetermined port (such as
7777) and at runtime, a random public port is chosen that game clients can then use to reach the game server. If the game server needs to communicate its public IP and ports to an outside system, such as a server list, the game server needs to query this data from the Agones SDK. See Discovering Your Public Address for details. - Passthrough may be required if a game server requires public and local port to be the same (Steam's A2S query being a notable example). The public port is randomly chosen at runtime, and the game server then has to locally bind to that specific port after retrieving it from the Agones SDK. Passthrough should only be used when required.
Below are some port name conventions and what they are typically used for:
| Port Name | Usage |
|---|---|
| game | Primary game traffic port, often UDP. |
| query | Port to retrieve meta data about the server, such as current number of players. |
| rcon | Any remote control endpoint that can be used to manage the game server at runtime. |
| allocator | Callback endpoint for a server allocation mechanism. |
INFO
The allocator port is used by the Allocator service, which manages server assignment for matchmaking-based games. Games that rely on a server browser instead of matchmaking do not require this port.
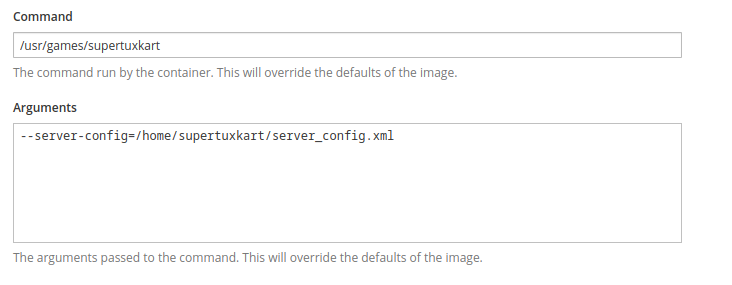
Command and arguments
You can also override the command run by the container, as well as CLI arguments your game server starts with.
If left empty, the game server starts with the default arguments defined in the container's Dockerfile for the properties CMD and ARGS, respectively.
Volumes
In this section, you can point previously specified volumes to specific paths in your container. Since you likely have not set up a volume for this first game server, skip this for now.
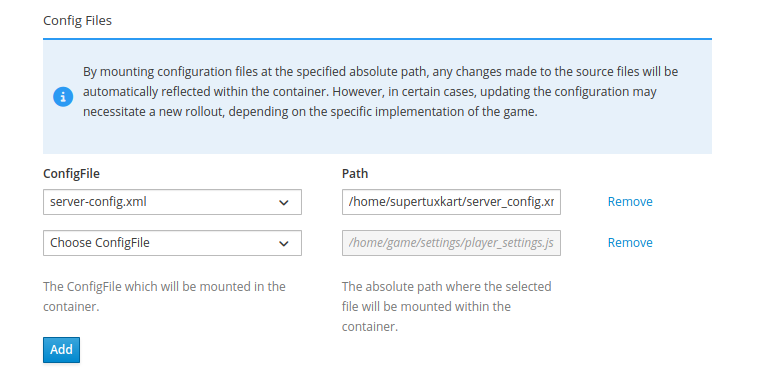
ConfigFiles
In the next section, you may mount the volumes previously configured, as well as any configuration files previously defined within your environment.
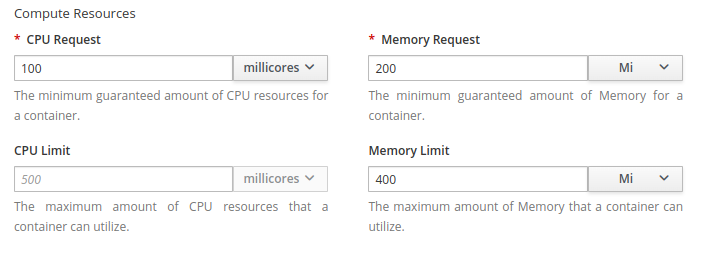
Resources
Resources are the CPU and memory required by your game server. This definition comes in two parts:
- Requests (Mandatory): These are the resources that are guaranteed to your game server, and should be set to values that realistically resemble the resource consumption of an average game server that is in use. These requested values are used for scheduling decisions, which means that the game server is only started on a node that is guaranteed to still have these resources available.
- Limits (Optional): Additionally, hard limits can be set for the resources the game server is allowed to use. If the game server exceeds its memory limits, it will be terminated, and if it exceeds its CPU limits, it will be throttled. It is generally recommended to set the memory limit to a threshold that would indicate a memory leak that warrants termination, and to not apply CPU limits, unless negative effects have been observed.
Resource Configuration
For detailed guidance on setting CPU and memory resources, see the Resource Management guide, which provides best practices for optimizing performance and costs.
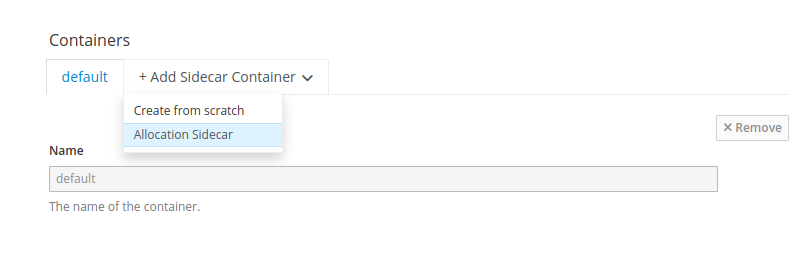
Sidecars
Once you are done configuring your game server container, you may go back to the top of the page to add a sidecar container if you want to use one. The selector allows you to directly create an Allocator sidecar, or to create a new arbitrary container from scratch.
Advanced options
In this last section you can adjust advanced options like enabling profiling, configuring health checks, and defining grace periods for game server termination.
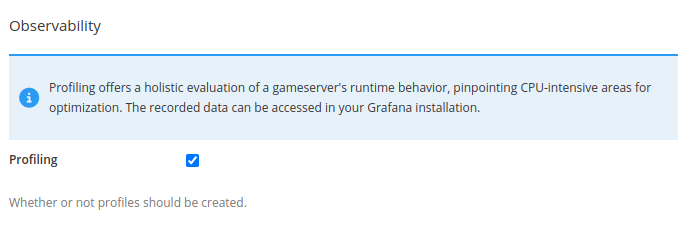
Profiling
GameFabric Multiplayer Servers has built-in support for eBPF-based CPU performance profiling using Grafana Pyroscope. This feature has an expected CPU performance impact of just 2-3%, so in most cases it is safe to enable.
Learn More
For details on troubleshooting profiling issues, including symbol resolution, see the Profiling guide.
Health checks
If a game server fails to call agones.Health(), it will be considered unhealthy and terminated. The thresholds for that process can be configured here. The default values are usually okay to use.
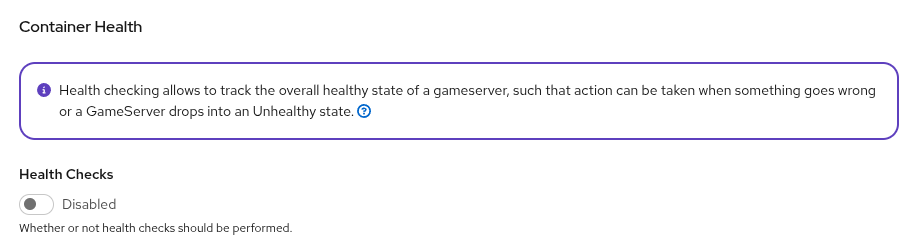
Health Checks: Default State & Best Practices
Health Checks are disabled by default to simplify the initial testing and integration of your Game Server SDK. However, for production usage, it is recommended that they be enabled. If Health Checks remain disabled in a live environment, game servers that enter an unresponsive or "frozen" state cannot be automatically detected or cleaned up by the platform, leading to potential matchmaking failures. Additionally, we do not make any promises as to lifecycle handling of such game servers without health checks during maintenances; game servers without proper integration may be evicted at a moment's notice during maintenance.
Termination grace periods
Game servers may receive Shutdown Hints, observable via the Agones SDK. These hints are used when game servers need to shut down within a specific time frame due to an external reason.
The reasons for a server to be told it should shut down are:
- Maintenance: The Site the game server is running on is being put into maintenance and needs to be emptied.
- Spec Change: The game server configuration was updated (such as a new version being available), and the game server needs to shut down so that the new configuration can be applied.
- User Initiated: A suspension or restart was triggered by a user through the GameFabric UI or API.
Your game server is expected to handle shutdown hints explicitly:
- Observe the shutdown hint on the Agones GameServer object.
- If a hint is present, treat its timestamp as a deadline and start shutdown handling immediately.
- Exit the game server process before the hint timestamp is reached.
For the best player experience, implement graceful shutdown logic that lets active sessions end cleanly before exit. At minimum, show an in-game message such as "This server will shut down in X minutes" and stop accepting new matches.
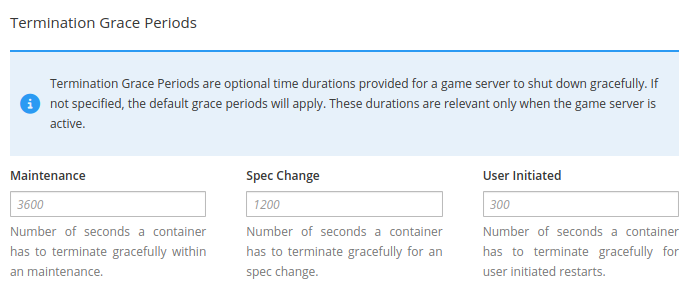
The configured grace period is the time that the game server can use to gracefully shut down, for example, by informing the players to disconnect and shutting down when all players have left. When the game server has not shut down before the grace period has passed, it is forcefully terminated.
Visualize and configure
Now that the Vessel has been successfully created, it should become visible in the "Vessels" section. If the game server starts up as expected and completes its agones.Ready() call, the state of the Vessel should switch to "RUNNING".

You may click on the "Details" button to see more information.
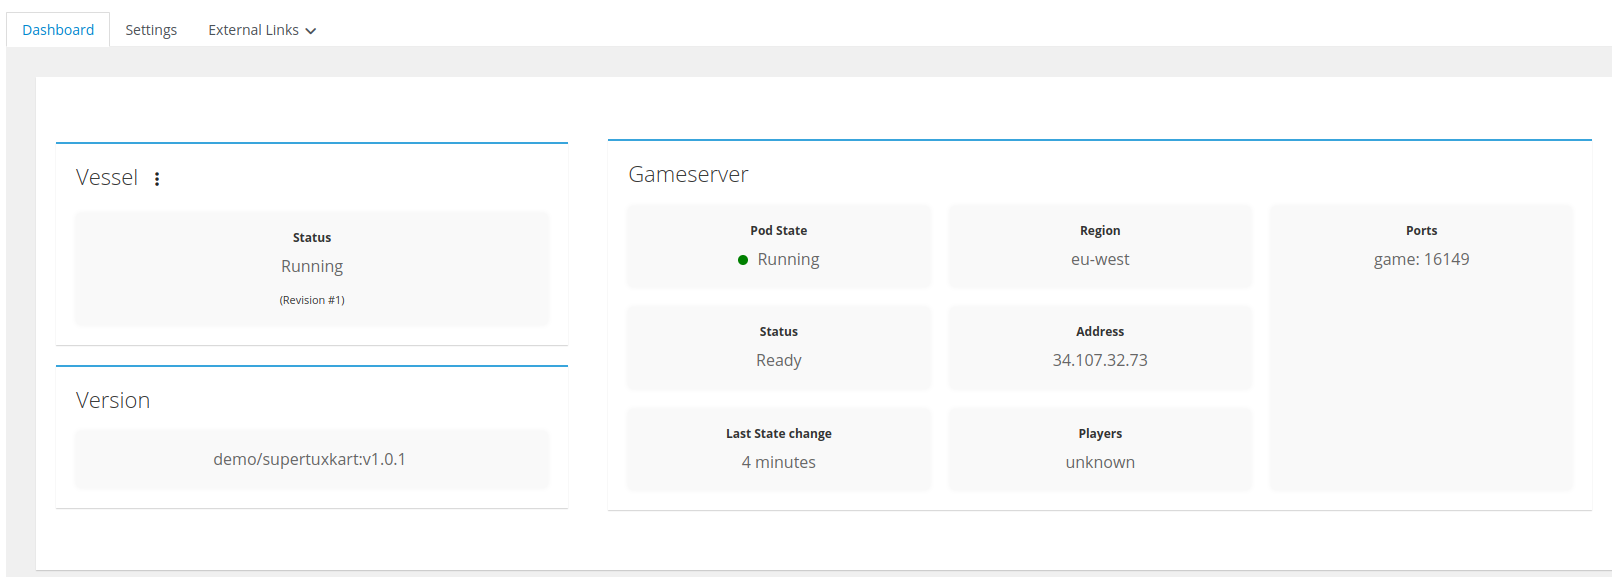
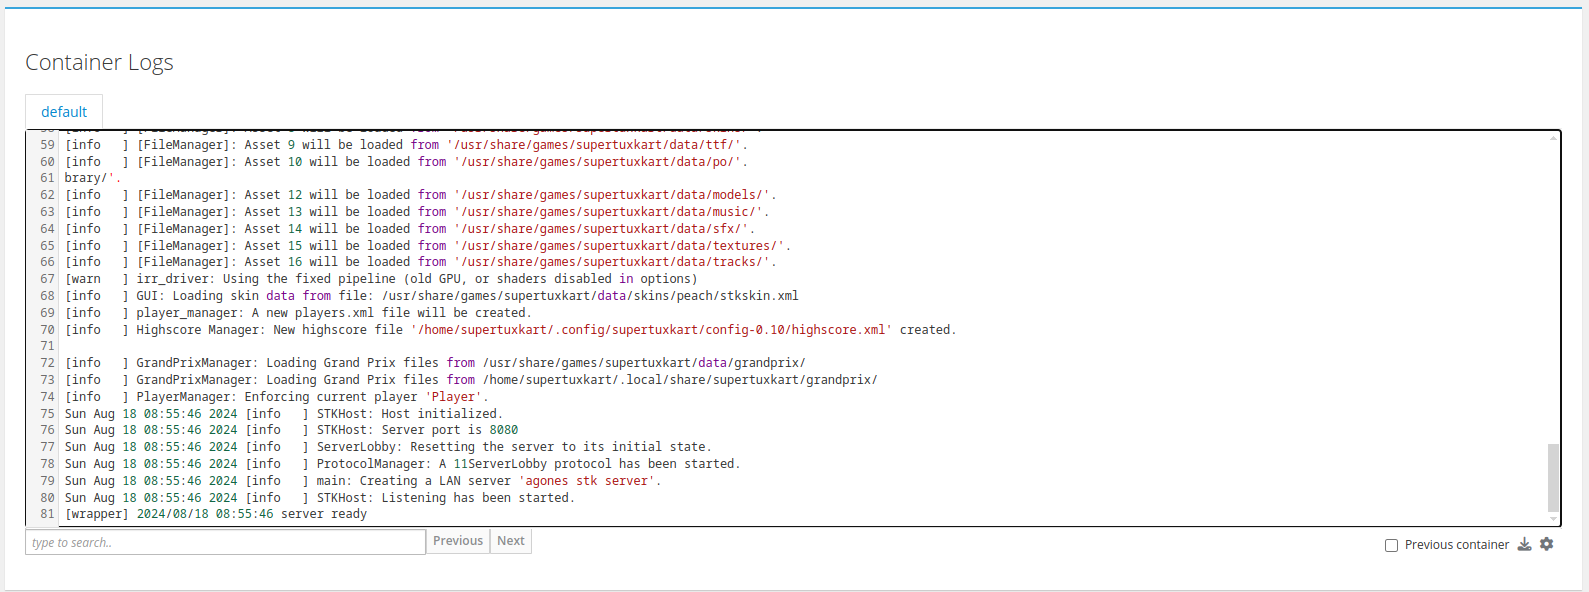
In this view, you see the most important information about your game server, such as its public IP and ports. You can now use this information to perform a test connection to your game server.
On the same page, you can also inspect the logs of your game server, to troubleshoot any issues that occur.